
You can't beat classic hummus. Especially homemade - it’s one of those foods that tastes way better than store-bought varieties.
Originating from the historical Levantine cuisine (Eastern Mediterranean ) hummus is a popular spread or dip. It’s made from a combination of chickpeas, tahini, lemon juice, olive oil, garlic and salt, that has been blitzed into a smooth (or chunky, depends how you like it – you do you) paste.
Hummus – Nutritious to Boot
When prepared with these traditional ingredients, it’s superbly nutrient-dense and with a myriad of health benefits – it’s rich in belly-loving dietary fibre; antioxidant-rich ingredients that help fight free-radical damage within the body, like olive oil and tahini; it’s a source of plant-based protein, it’s good for those with dietary intolerances as it’s naturally gluten, dairy and nut free; and it has a low-glycemic index – meaning it will release its energy slowly into your blood stream, leaving you sustained for longer *insert thumbs up*.
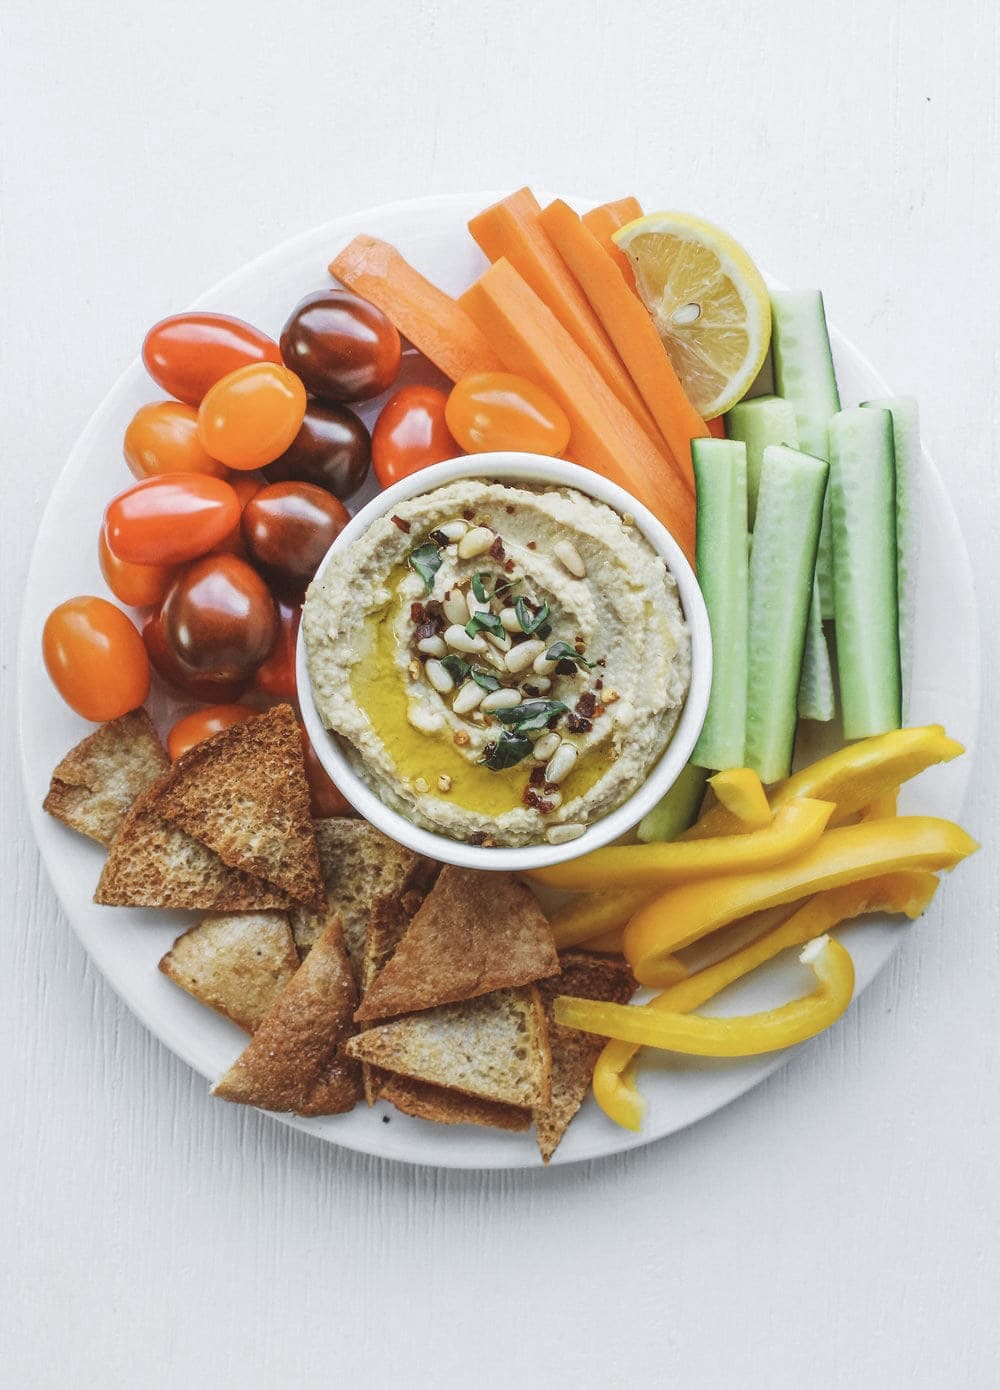
Serving wise, it’s really easy to weave into your diet! Enjoy it with fresh veggie sticks, as a nutritious sandwich spread, as a big dollop on top of a salad, spread over a rice cakes as a snack or even just classic chip-and-dip style.
Next Level Hummus: Roasting Your Garlic
This recipe uses roasted garlic which adds a whole new dimension to the humble dip. While you can totally use raw garlic – I have may times, and it’s delicious – roasting garlic brings a nutty, sweet taste, and makes it a little less pungent, which is always a good thing when garlic is in the equation.
If using raw garlic make sure to reduce the number of cloves to 4-6. Add 4 to start, blitz, taste-test, then add more if needed. Let your senses to guide you!
Roasted Garlic Hummus
Rating:
Ingredients:
- 2 tins of chickpeas
- 6-8 cloves of garlic
- ½ cup of freshly squeeze lemon juice
- 3 Tbsp tahini
- 3 Tbsp olive oil
- ½ tsp salt
- Optional: paprika, cumin, cayenne pepper, more salt to taste…
Method:
- Preheat oven to 220 degrees celsius. Cut the top and bottom off each garlic clove, leaving the skin still on. Lightly toss cloves with a drizzle of olive oil, and then wrap in tinfoil. Bake for one hour (get ready for the most delicious smell to waft through your house!).
- Open your tins of chickpeas, pour chickpeas into a sieve, drain liquid, and rinse well with water.
- Add all ingredients to a food processor (expect salt). For the roasted garlic, simply squeeze garlic out of its skin! Discard skin. Process for a few minutes, stopping to scrap down the sides. It will look quite thick and chunky.
- Add the salt (and any extra spices – paprika, cumin…) and blend until smooth. Add a few tablespoon of water if you'd like a smoother consistency.
- Taste test and season with extra salt or spices to your liking.
- Transfer hummus into a bowl. Drizzle a little olive oil on top, and garnish with fresh herbs and chopped nut (if desired). Serve with a platter of colourful fresh veggies or crackers.
Notes:
Storage: Keep hummus in an airtight container in the refrigerator for up to five days.
Leave a Comment & Rate this Recipe
If you enjoyed this dish, please consider giving it a star rating when you post a comment. Star ratings help others discover my recipes online (and your reviews make my day! 🙂 ). Happy cooking and baking. Danijela x
No Comments
How many cups (cooked) would 2 tins of chickpeas be? Thank you! (Lovely recipe btw 🙂 I’m loving the blog)
Hi there! Thank you, glad you enjoy it 🙂 One cup dried chickpeas would equal around 2 cans (around 400grams each) of drained chickpeas x